Hi lovelies!

Loopy Loop Handbag
Valentine’s Day is getting closer and we have a very nice project to share with you for this special day.
The Loopy Loop Handbag is very easy to make a project that consists of one single flat piece with another long strip added to it.
It can be made with any Knitting or Crochet pattern, as long as you know how to make swatches, so you can calculate how many stitches you will need.
But in all honesty, I kind of designed it as I went along, but yes, I had to repeat it a few times to get it right. So, if you want to save yourself the pain of unraveling, then a swatch is the way to go. Besides, we all have different needles, yarn, and tensions in from of us, so we need swatches.
I knitted this project with very chunky yarn, similar to this one and my Lantern Moon Collection knitting interchangeable needles.
To make it easier, I have outlined the project in steps:
-
Make your swatch and write down how many stitches and rows you will need to make a 20cm by 20cm (7.87 inches) square. This will be the measurement of the pocket.
-
Cast on your stitches and knit your chosen pattern till you get that 20 cm (7.87 inches) in height.
-
Bind-off 4/5ths or so of the stitches, so you’ll be left with only about 4-6 stitches or so, depending on your pattern. Write down how many stitches you are binding off.

super easy knit handbag
-
Continue knitting this single part until you have 20 cm (7.87 inches) from the edge of your ‘binded-off’ stitches to your current ‘live’ stitches. This is a long skinny strip that will later be one of the handles.
-
Cast-on the stitches you had ‘binded-off’ back again.

knit handbag in one piece
-
Continue knitting for another 20 cm (7.87 inches) in height
-
Bind off all your stitches. Fold in half, matching the two squares together.
-
Knit a long piece for the other side handle: it should be roughly 6 cm in width (2.36 in) and longer than the whole project. About 64 cm (25.19 inches)
-
Sew the long piece to the side of the two big rectangles.


-
Sew the whole big piece side, leaving about 19-20 cm without sewing. This is the handle.
-
Sew the bottom of the bag
-
Sew the other side of the small handle, leaving a space for the handle to receive the other loop through.
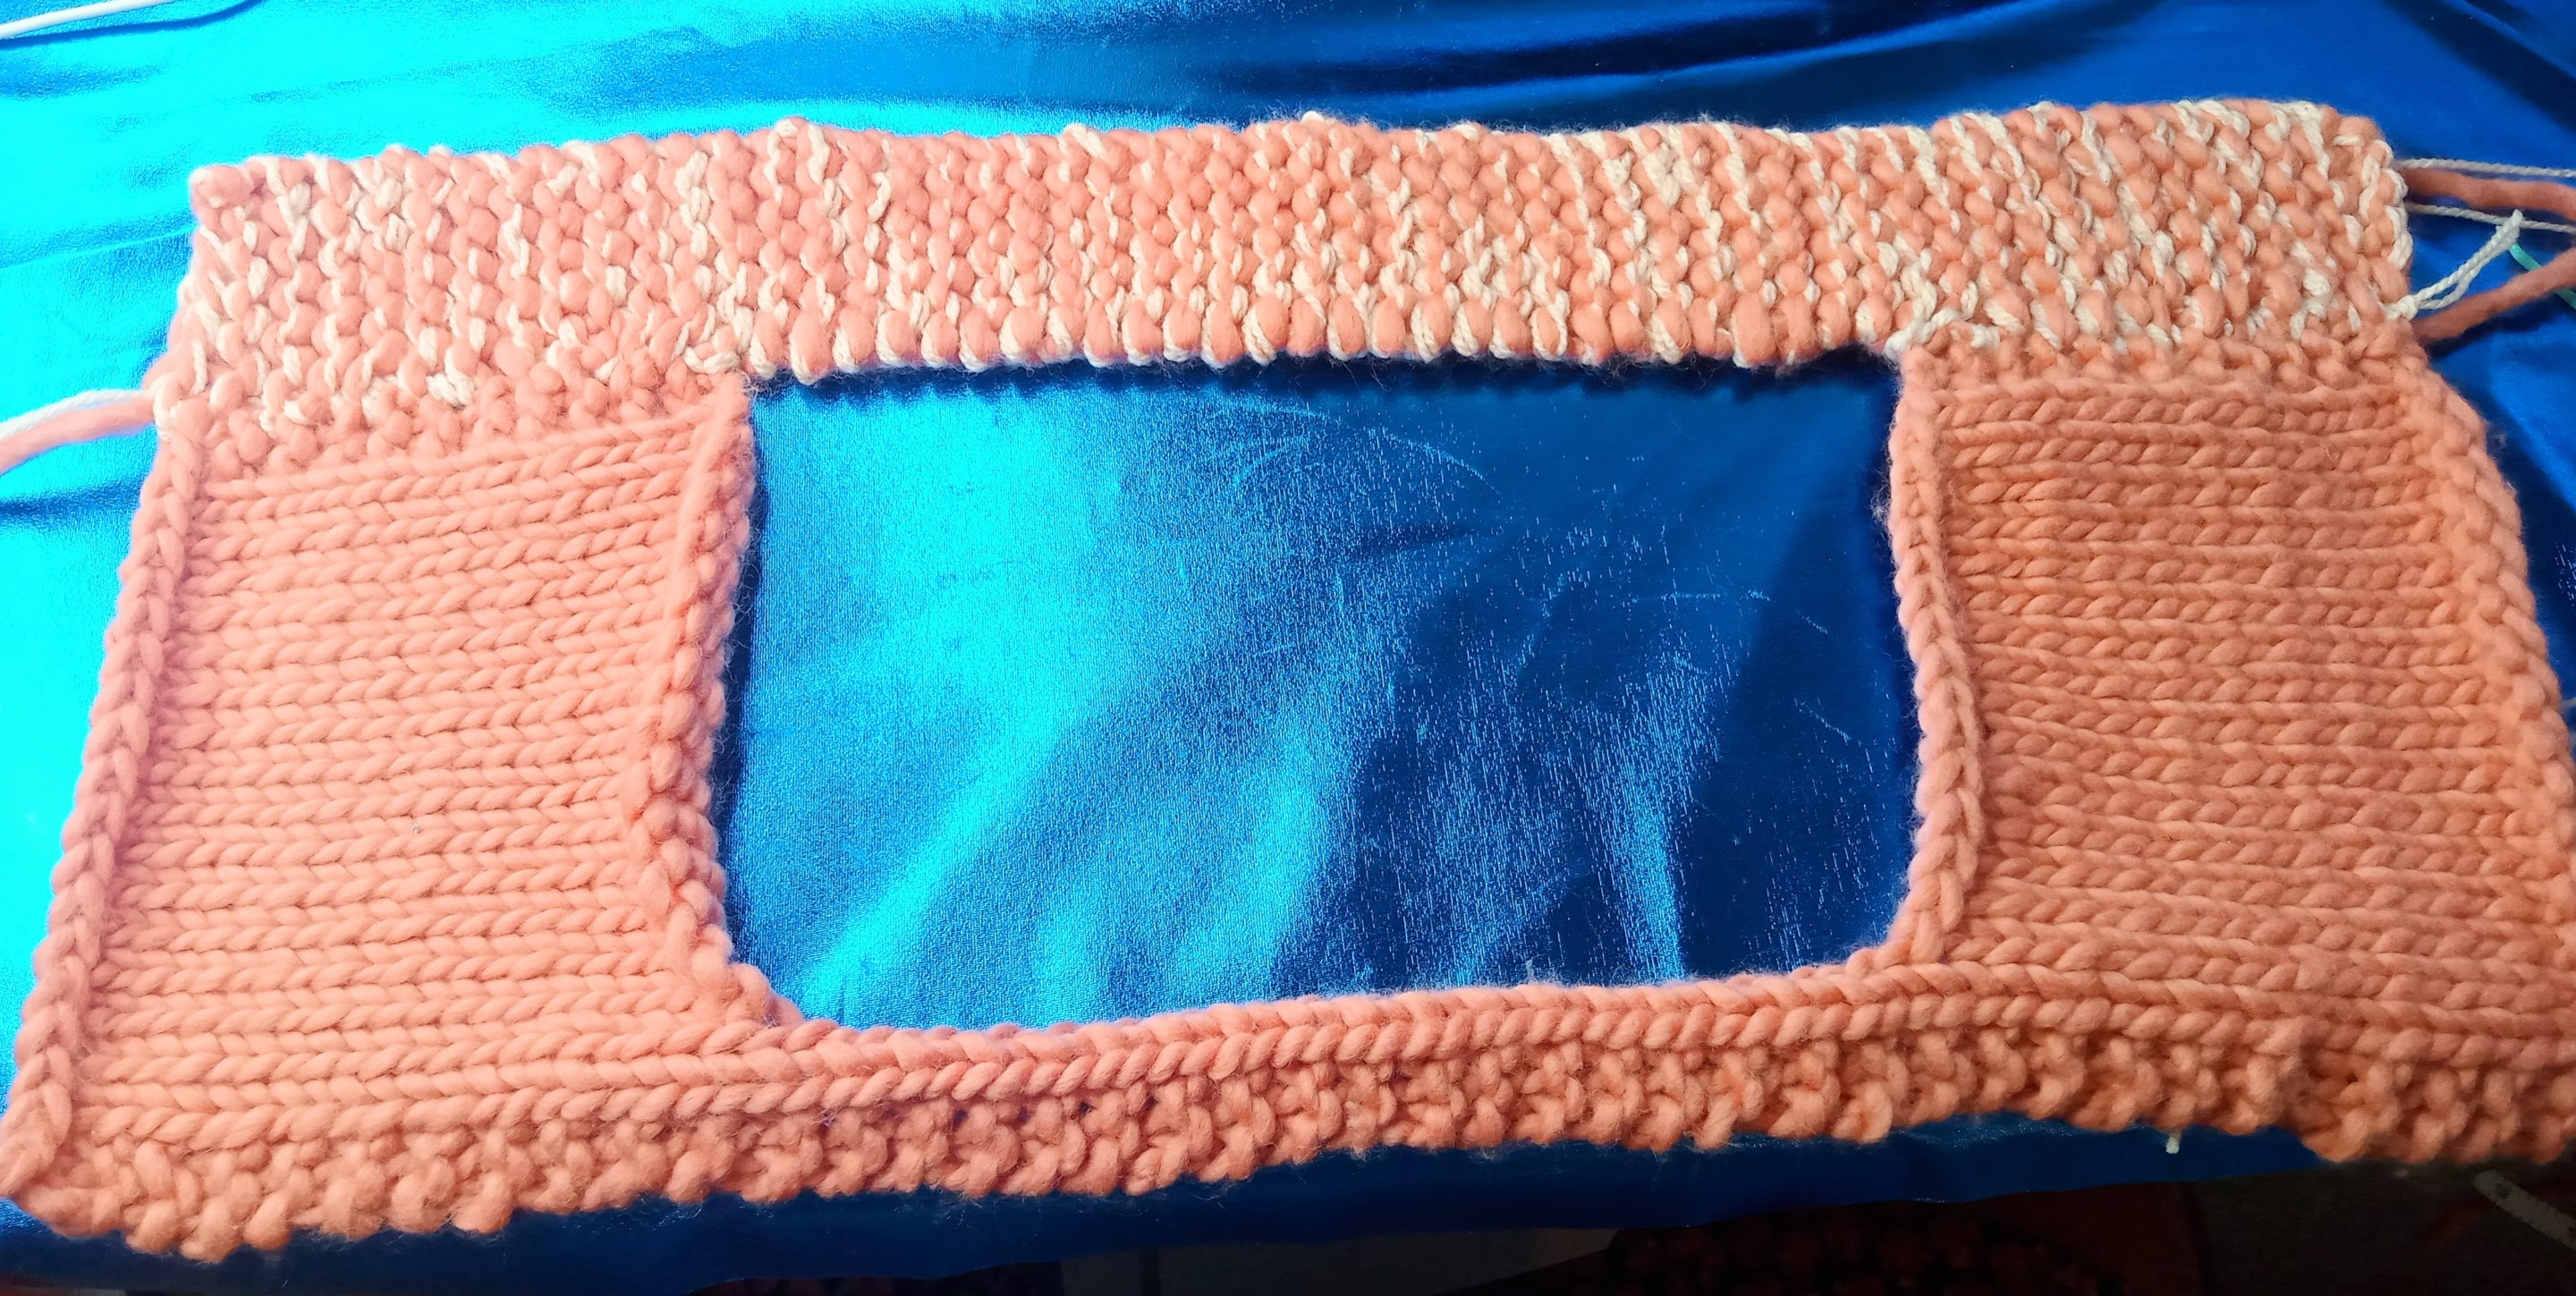
So, to summarize, this project is knitted flat by making a rectangle, leaving live stitches on one side that you will continue knitting. These live stitches you continue to knit to make a long piece and then you cast-on the stitches back again to make the other rectangle.
The shape without sewing and before adding the second strip should look like a weird letter ‘C’.


You knit the thicker side piece and then you join it to the side.
A pretty easy project to make for anyone, any stitch pattern, any fiber arts (like Crochet) preference.
Embellish as you please. You can use tasels, embroider over knitting.
Also, a larger version of this would make a very nice school or beach bag.
Please share your photos or questions to:joannesweb@gmail.com or use the hashtag #loopyloopbag on Instagram.
Are you interested in more projects like this? Here are some ideas inside our blog: https://joannesweb.com/category/blog/
We also have lovely patterns designed by us inside our Store. Please help out our efforts.
SUBSCRIBE TO OUR YOUTUBE CHANNEL to learn all about knitting and crochet. From stitch patterns to full tutorials!


0 Comments