It’s Fall and with it beautiful Fall Folliage and Pumpkins!
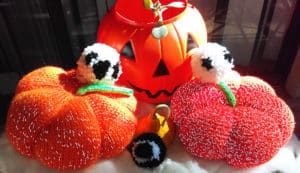
We decided to make a couple of Pumpkin decoration ideas for you: one for Knitting and one for Crochet.
Our post includes some affiliate links that help us continue and grow our business at no additional cost to you, so thank you for checking them out.
They are simple repetitions of both the CABLE VINES KNITTING PATTERN and the WAFFLE CROCHET PATTERN as follows:
Cable Vines Knitted Pumpkin
Video after instructions: https://www.youtube.com/watch?v=RlMZQrvQ6hk&t=9s
Worsted weight yarn and 5mm (US Size 8) Knitting Needles were used.
Here are some suggestions:
Cast-on 70 Stitches
Stockinet Stitch for 4 rows (knit one row, purl one row, knit one row, and purl one row).
Then start with the pattern for the CABLE VINES: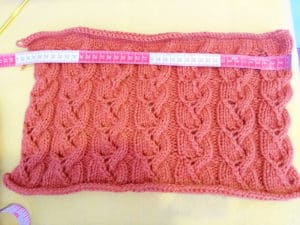
ssk= slide 2 stitches, one at a time, knitwise, from left to right needle,
then knit them.
c6b= make cable by placing 3 stitches in cable needle in the back of work.
Knit 3 stitches from the regular needle and then the 3 from the cable needle.
Repeat from * to *
Rows 2, 4, 6, 8 and 10 are done: *knit 1, purl 8 and knit one*
Row 1.- *p1, k2, yo, ssk, k4, p1*
Row 3.- *p1, k3, yo, ssk, k3, p1*
Row 5.- *p1, k4, yo, ssk, k2, p1*
Row 7.- *p1, k5, yo, ssk, k1, p1*
Row 9.- *p1, c6b, yo, ssk, p1*
Repeat these 10 rows until the desired length.
You’ll end up with a rectangle piece measuring approx. 38 mm (15 in) on its longest part and 26 cm (10.23 in) on its shorter side, though you can make adjust any of these repetitions as you wish.
Sew together the shorter sides and gather the bottom (where you started) to close the bottom side completely. 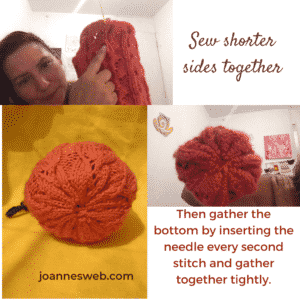
Waffle Crochet Pumpkin
Video tutorial on the bottom after instructions: https://www.youtube.com/watch?v=IuFgNP0Hn_o&t=264s 
Worsted weight yarn and G Crochet Hook
Chain 74
Row 1.- Dc in the 3rd ch from hook and make a dc in each ch across
Row 2.- Ch 1 and turn. 1dc in the first stitch you see * fpdc, and 2dc on the next 2 stitches*
Make a fpdc and a dc on the top of the turning chain.
Row 3: Ch 1 and turn. Make 1 dc in the first stitch you see *Make a dc in the next stitch, and 2 fpdc*, dc on last two stitches.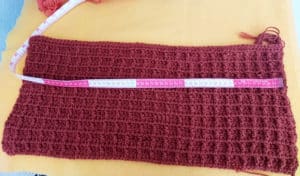
Repeat Rows 2 and 3.
End with Row 2 for the edge.
You’ll end up with a piece measuring approx. 56 mm (22 in) on the longest part and 25 mm (9.9 in) on its shorter side.
Sew together the shorter sides and gather the bottom (where you started) to close the bottom side completely. (see reference image above for the knitted version).
For the decorative curly leaves, I used the Crochet Icicle video tutorial and adjusted to different sizes:
Once you follow the video and read the instructions, you understand that the way it curls is by crocheting 3 types of chains into one single chain space. Be it half double crochet or double crochet. So if you want to make a long spiral, start with more chains and go from smallest (slip) to larger (half double crochet) to largest (double crochet.
On one of them, I even added a triple crochet to make the section larger.
Here are the instructions for the Icicle Crochet Spiral:
INSTRUCTIONS
With #4 yarn (Worsted) and G Hook
(Or use hook according to what the yarn calls for)
Chain 26 stitches
Slip stitch on the first 5 chains
3 Single crochet on each of the next 10 chains
3 Half double crochet on each of the next 5 chains
3 Double crochet on each of the next 5 chains
Slip stitch on one of the chains where the double crochets were done.
Chain loop and slip stitch to the start.
Weave in ends.
Attach these to the top of the Pumpkins by sewing into the gathered stitches.
So…..what do you think?
Did you make any changes, did you make a different version?
Share your results with us!
joannesweb@gmail.com
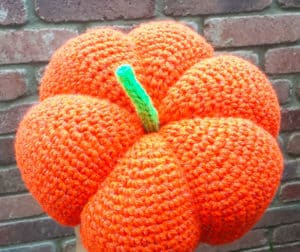
And if you’re interested, you can get the classing pumpkin patterns here:



0 Comments