Hi, lovelies.
Here we are with another fun and elegant knitted project idea for you:
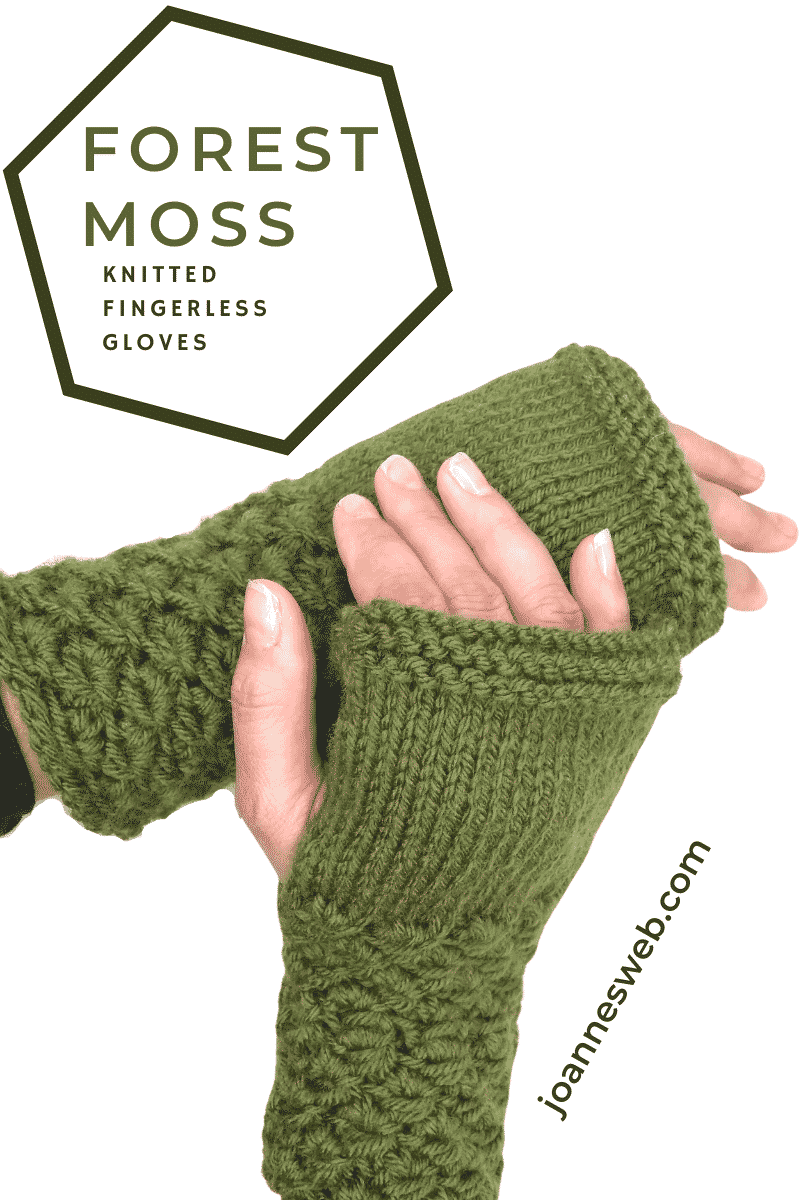
The Forest Moss Knitted Fingerless Gloves.
This simple pattern can be done on a weekend with basically any kind of yarn and matching needles.
As always, we recommend making a swatch first and calculating how many stitches you would need for your specific desired size (width and length of the hand).
The project is made out of the Anemone Knitted Stitch, the simple stockinette stitch, and three rows of garter stitch for the edge and beware: it is a little loose at top of the palm, where the garter stitch ends. This is because I continued the project with the 40 stitches, but if you want a tighter fit on the top, you might want to decrease some stitches (about 4 on each side) to make it a bit tighter once the stockinette part begins.
This post includes affiliate links at no extra cost for you. Thanks for checking them out.
Also: We get inspired to make a project with the Anemone Knitting Stitch, found on Hands Occupied.

This is a video of the Anemone Stitch, used at the beginning of this project.
MATERIALS:
- Lion Brand Yarn (1) in Olive Green.
- 5 mm (US 8, UK 6) Knitting Needles.
- Tapestry needle to sew together
INSTRUCTIONS:
Cast-on 40 stitches or adjust to your desired size, as long as it’s a multiple of 4.
Start with the Anemone Stitch:
Co 40 st
Knitting skill level: Easy to Intermediate
(WS) Wrong Side
(RS) Right Side
Sl: Slip stitch
k4tog: Knit 4 together
p4tog: purl 4 together
p: purl
k: knit
st /sts: stitch and stitches
-
row 1. (WS) p, wrapping yarn twice for each st.
-
row 2. (RS) *Sl 4 sts to drop extra wraps, return the 4 elongated sts to the non-dominant needle, then (k4tog, p4tog) twice into these same 4 sts; rep from *.
-
row 3. p2, * p, wrapping yarn twice for each st; rep from * to last 2 sts, p2.
-
row 4. k2, *sl 4 sts to drop extra wraps, return the 4 elongated sts to the non-dominant needle, then (k4tog, p4tog) twice into these same 4 sts; rep from * to last 2 sts, k2.
-
Rep rows 1-4, four times.
After this point, you’ll have to decide if you want the same width for the stockinette part or not.
If you want it a bit tighter, I suggest you decrease 2 stitches on each side with k2tog and ssk. (if you’re making this for a man or someone with slightly bigger hands, then you’re good to go).
-
Start Stockinette part for 21 rows (knit on the right side and purl on the wrong side).
You can also adapt this part to your desired length and make more or fewer rows if you wish.
-
End with 3-4 garter stitch rows at the very edge of the glove for added sturdiness.
After this, you’ll have to sew the glove inside out. Only from the bottom edge to the base of the thumb, leaving a gap for the thumb and sewing from the top to the inside of the thumb.
On the left side is a video explaining this.
So how about that?
Isn’t this project super simple and quite unique?
Have you fallen in love with the Anemone stitch yet? I know I have.
What will you make next?
May I suggest some more projects? Here are some:
Also: check out our store for more patterns.
And feel free to visit our YouTube channel for a TON more project ideas.
Happy Holidays, ya’ll!


0 Comments